
Hello everyone!!! Today I thought I would share a layout with you that I have been wanting to do for a long time now. My inspiration came from a piece of paper that had sunshine rays on it. So I thought I would try it. I first selected a background paper then 4 patterned papers with different designs on them but making sure that the colours fit well with each other.
To start with I took a piece of 12 x 12 white paper (the piece that is inserted into your refills will do). I began drawing the rays onto the paper starting with the upper left corner of the paper, bringing it down to the middle of the bottom edge. Next to this, leaving a space in between, I drew the next one. I drew them randomly until I got the one in the middle done. Then I drew the ones on the other side of the paper the same size as the first ones. See below.

You will cut out the strips with scissors or your cutter if you want. These will be a template which you will trace onto the back side of your papers you have selected.
For the strips that go along the sides and down to the bottom I simply used the same strips that I cut for the top half. They will extend over the edges but this will not affect the layout. When you cut the actual strips for the layout, the ones on the side will be trimmed off. Lay your strips down onto your background paper as shown below. Do not adhere these down.
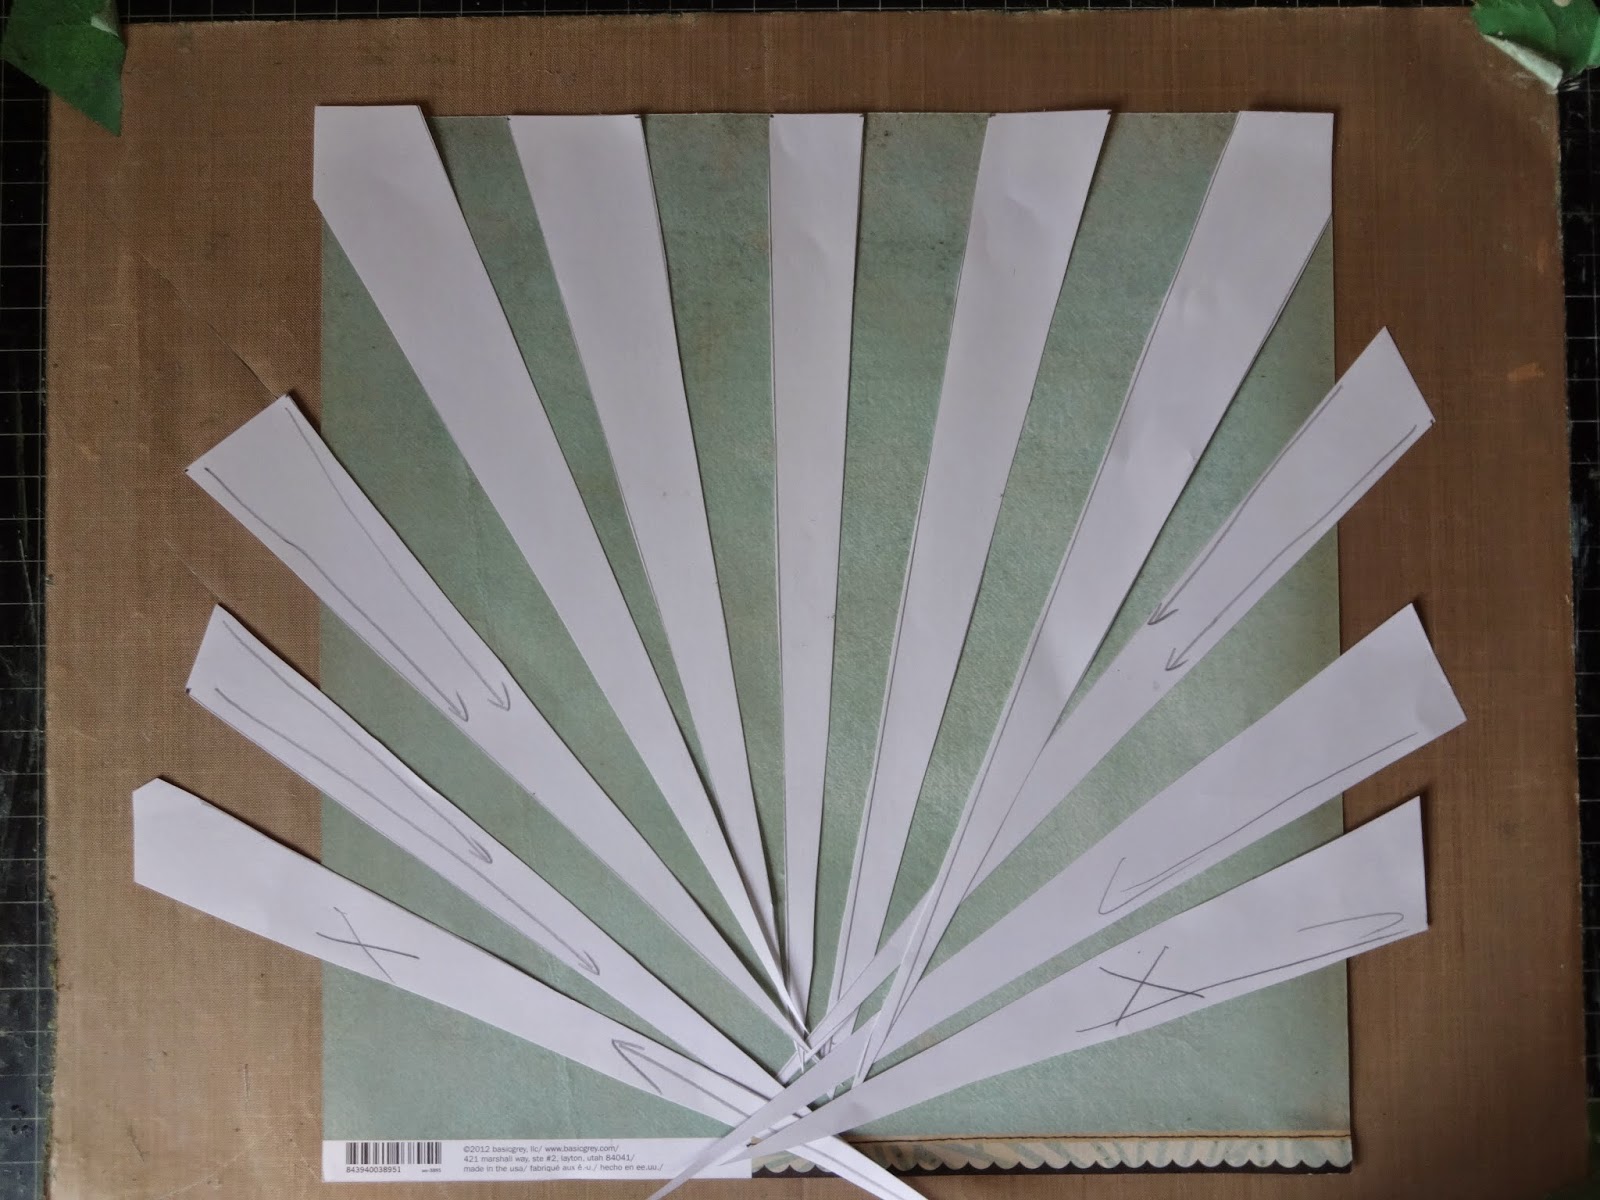
Now you will want to take the strip in the centre trace it out onto your patterned paper (on the back) then cut it out. Place this one in the spot where the tracer piece was. Do not glue the strips down yet. I then did my corner ones, then the others. Lay them all down to make sure you have them even and the patterns where you want. I also decided to add a thinner strip between the corner pieces and the striped ones. This is optional.

When you are happy you can begin adhering them down. Don't worry about the mixed up points at the bottom. As you can see from the layout I covered this spot with more papers and my pictures. I also added a strip at the bottom left and right corners. When they are all adhered take your scissors and trim off the ones that are off the edges of the background paper. Oh yes, make sure that you trim off the advertisement strip at the bottom of your paper. I actually took the picture before I did this. And here is the finished layout.

For the bottom section I selected a patterned paper that was not in the sun rays. It was 6" wide x 5" long. I adhered it even with the bottom edge and centering it. I then punched a couple of scalloped circles from the sun rays papers as well as a couple of 3/4" wide strips. I adhered my pictures onto chipboard and used pop dots to raise them up. Added some vines, flowers and brads. Very simple. I also placed white and yellow dimensional pearls dots between the sun ray strips to add a little sparkle.
I do hope you try this. It is quite easy to do.
Until next time
HAPPY SCRAPPING!!!!
and remember
"There are only two lasting bequests we can leave our children: one is roots; the other, wings." H.Carter
1 comment:
Gorgeous Donna!
Post a Comment